Getting Started
Import Your Data
Your bank statement, your way. We handle the messy parts—you stay in control of every transaction.
The import process at a glance
Upload your file
Map the columns
Preview & categorize
Import
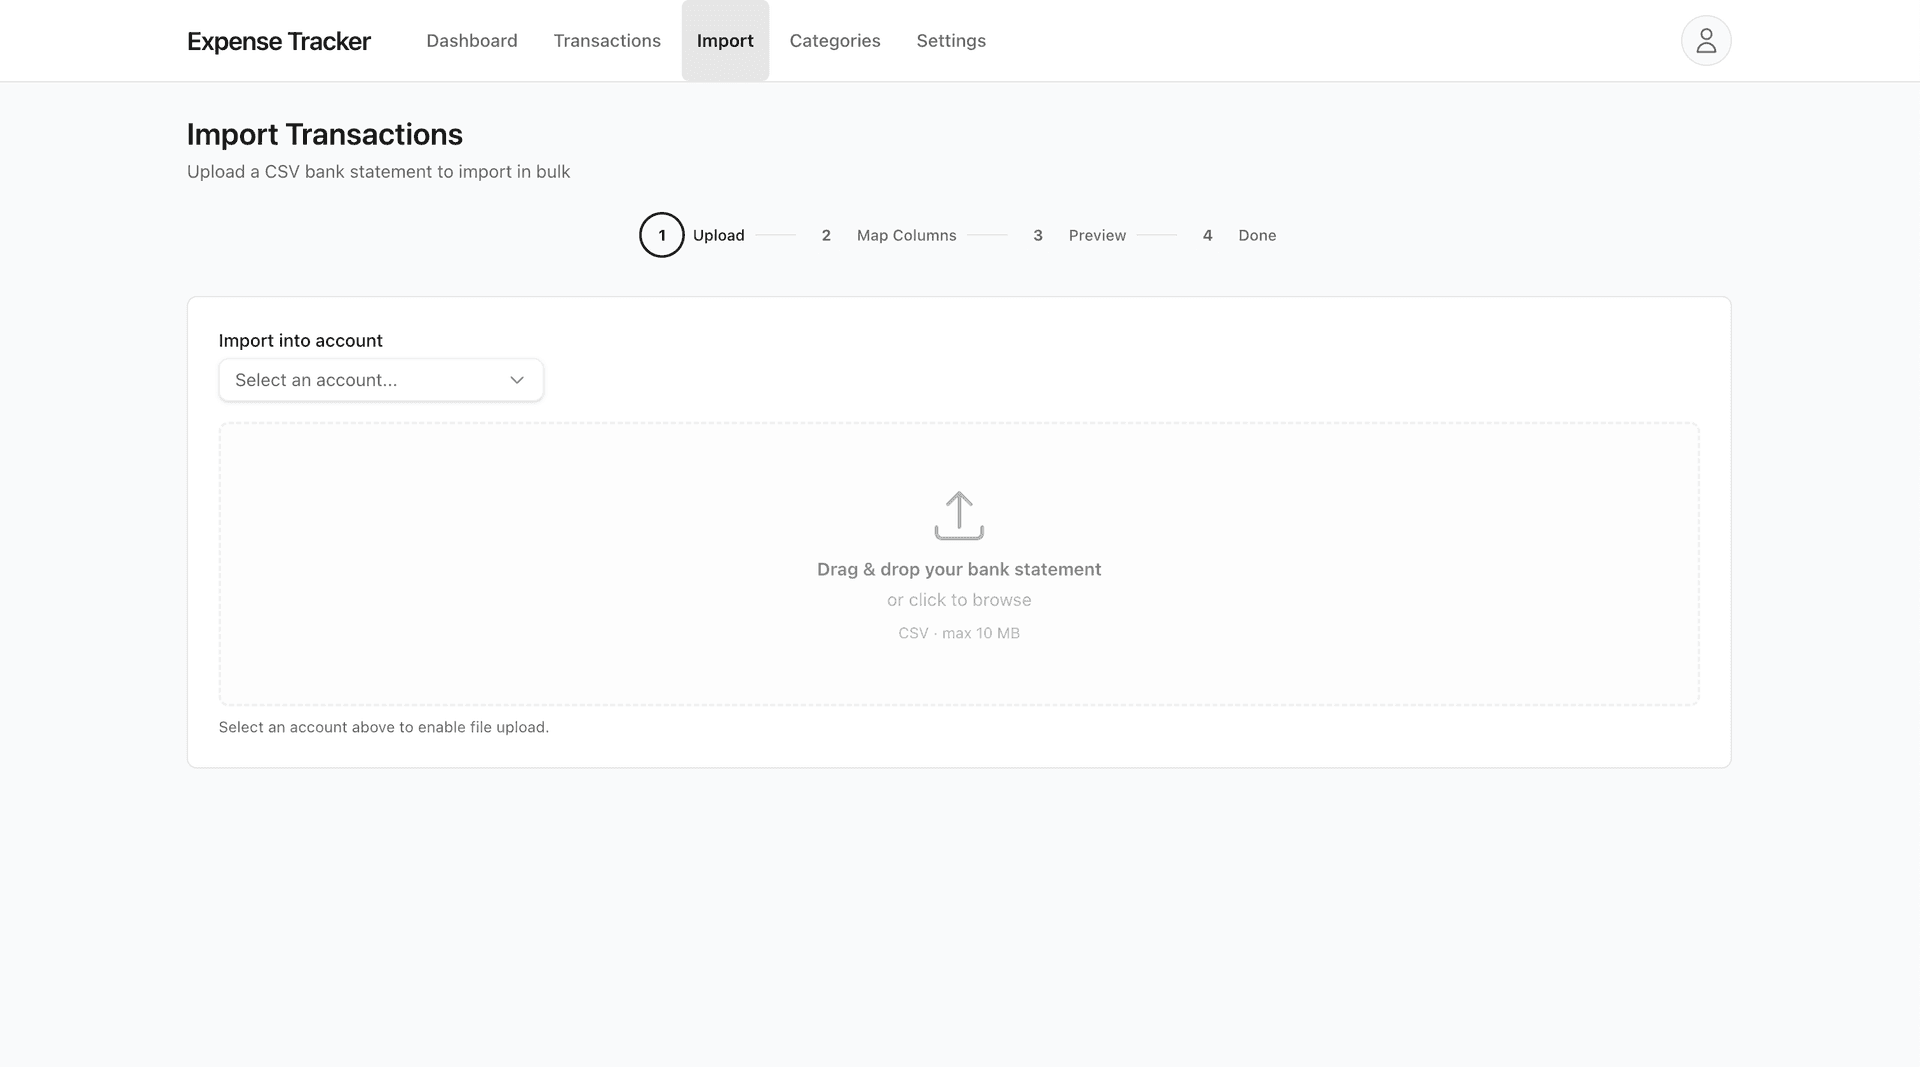
Upload your file
Start by exporting your transactions from your bank. Most banks offer this under "Statements," "Transaction History," or "Download." Look for CSV format.
What we accept
CSV files
.csv
File size
Up to 10 MB
Drag your file onto the upload area, or click to browse. Before uploading, you'll select which account this statement belongs to—checking, savings, or credit card. If you haven't created an account yet, you can do it right there.
First time importing? We recommend starting with 3 months of history. More data means better habit detection and more useful insights on your dashboard.
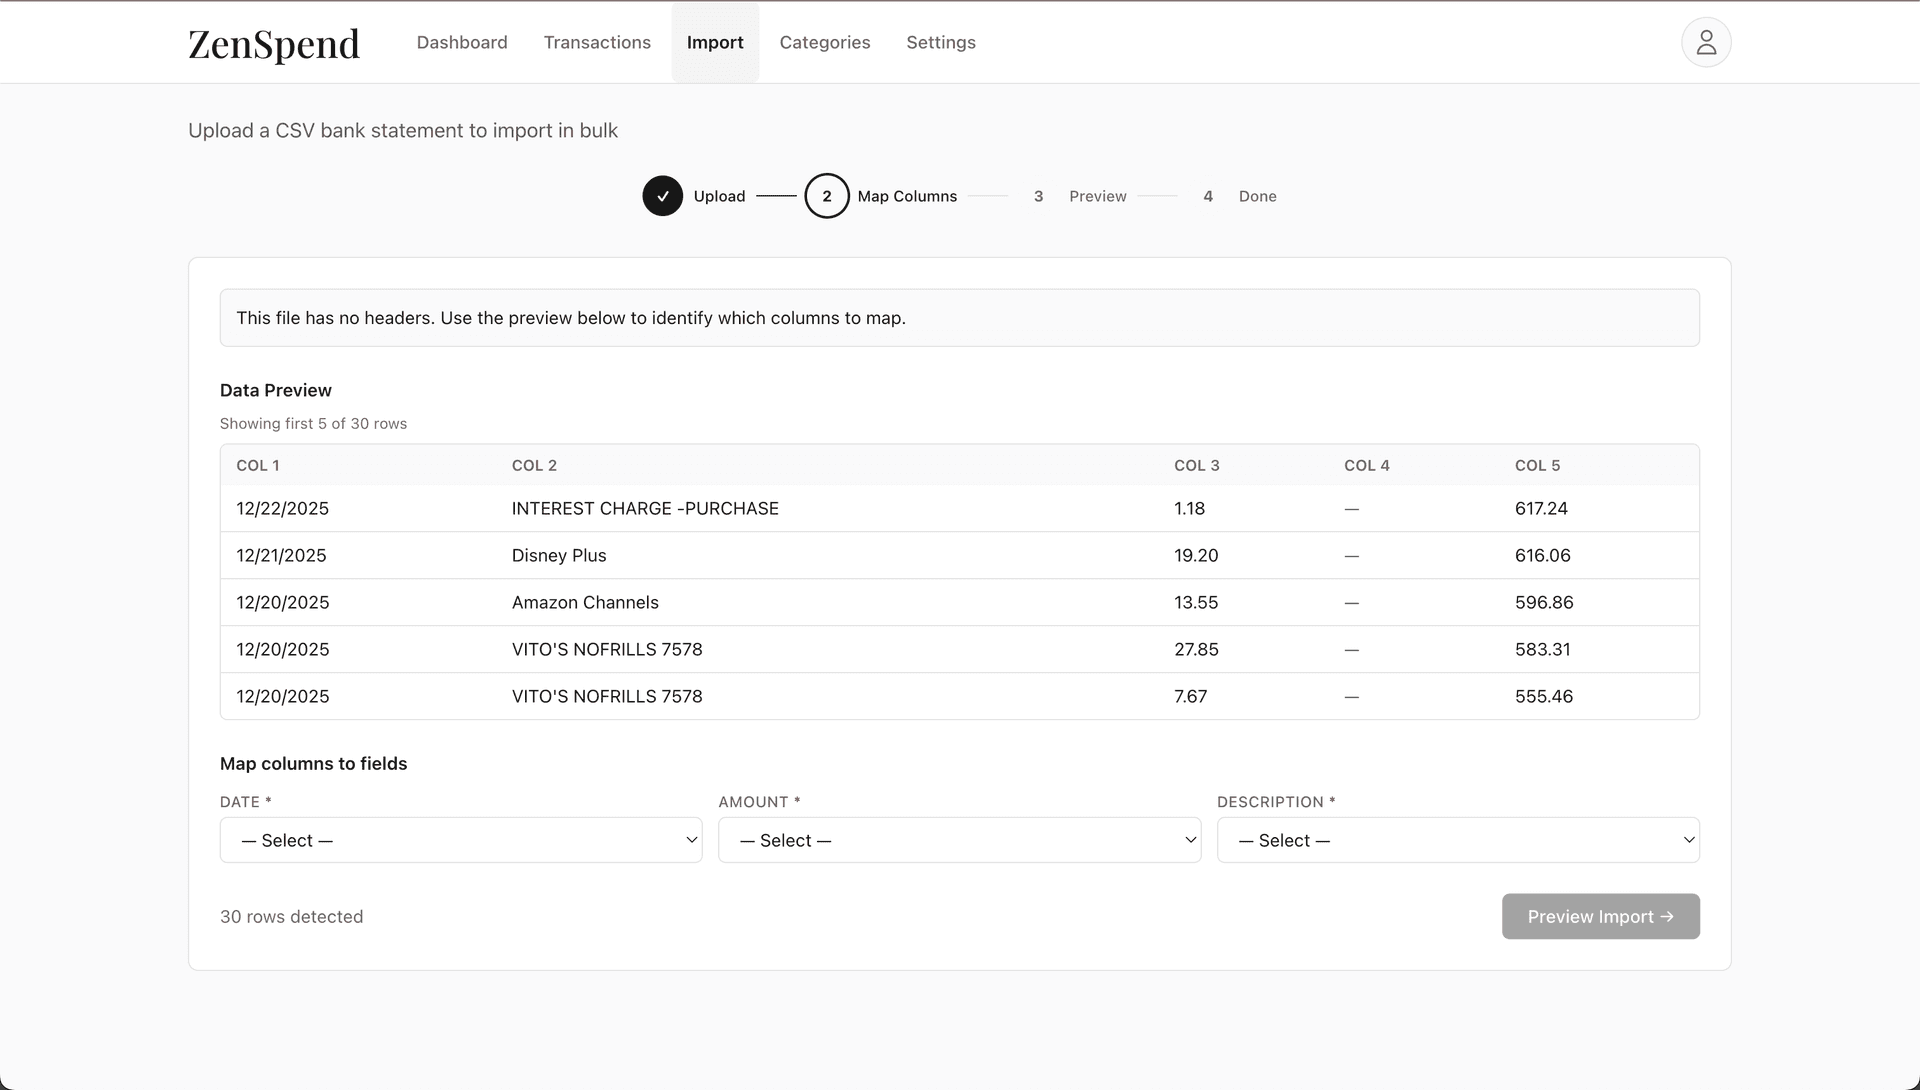
Map the columns
Every bank formats their statements differently. Some call it "Transaction Date," others call it "Posted Date." Some have one amount column, others separate debits and credits. We handle all of it.
You'll see a preview of your data and three dropdowns: Date, Amount, and Description. Just pick which column is which. We show sample values to make it obvious.
Two ways to handle amounts
Single column
Most common. One column shows all transactions—positive for deposits, negative for withdrawals (or vice versa). Works for credit cards and most bank exports.
Separate debit & credit
Some banks (especially for checking accounts) have two columns—one for money out, one for money in. We combine them automatically.
No headers? No problem.
If your file doesn't have column headers (just raw data), we detect that automatically. Instead of column names, you'll see "Column 1," "Column 2," etc., with sample values to help you identify them.
We remember your mapping
After your first import from an account, we save the column mapping. Next time you import from the same bank, everything is pre-filled. Just verify it looks right and continue.
Preview & categorize
This is where you have full control. Before a single transaction touches your account, you see everything—and can change anything.
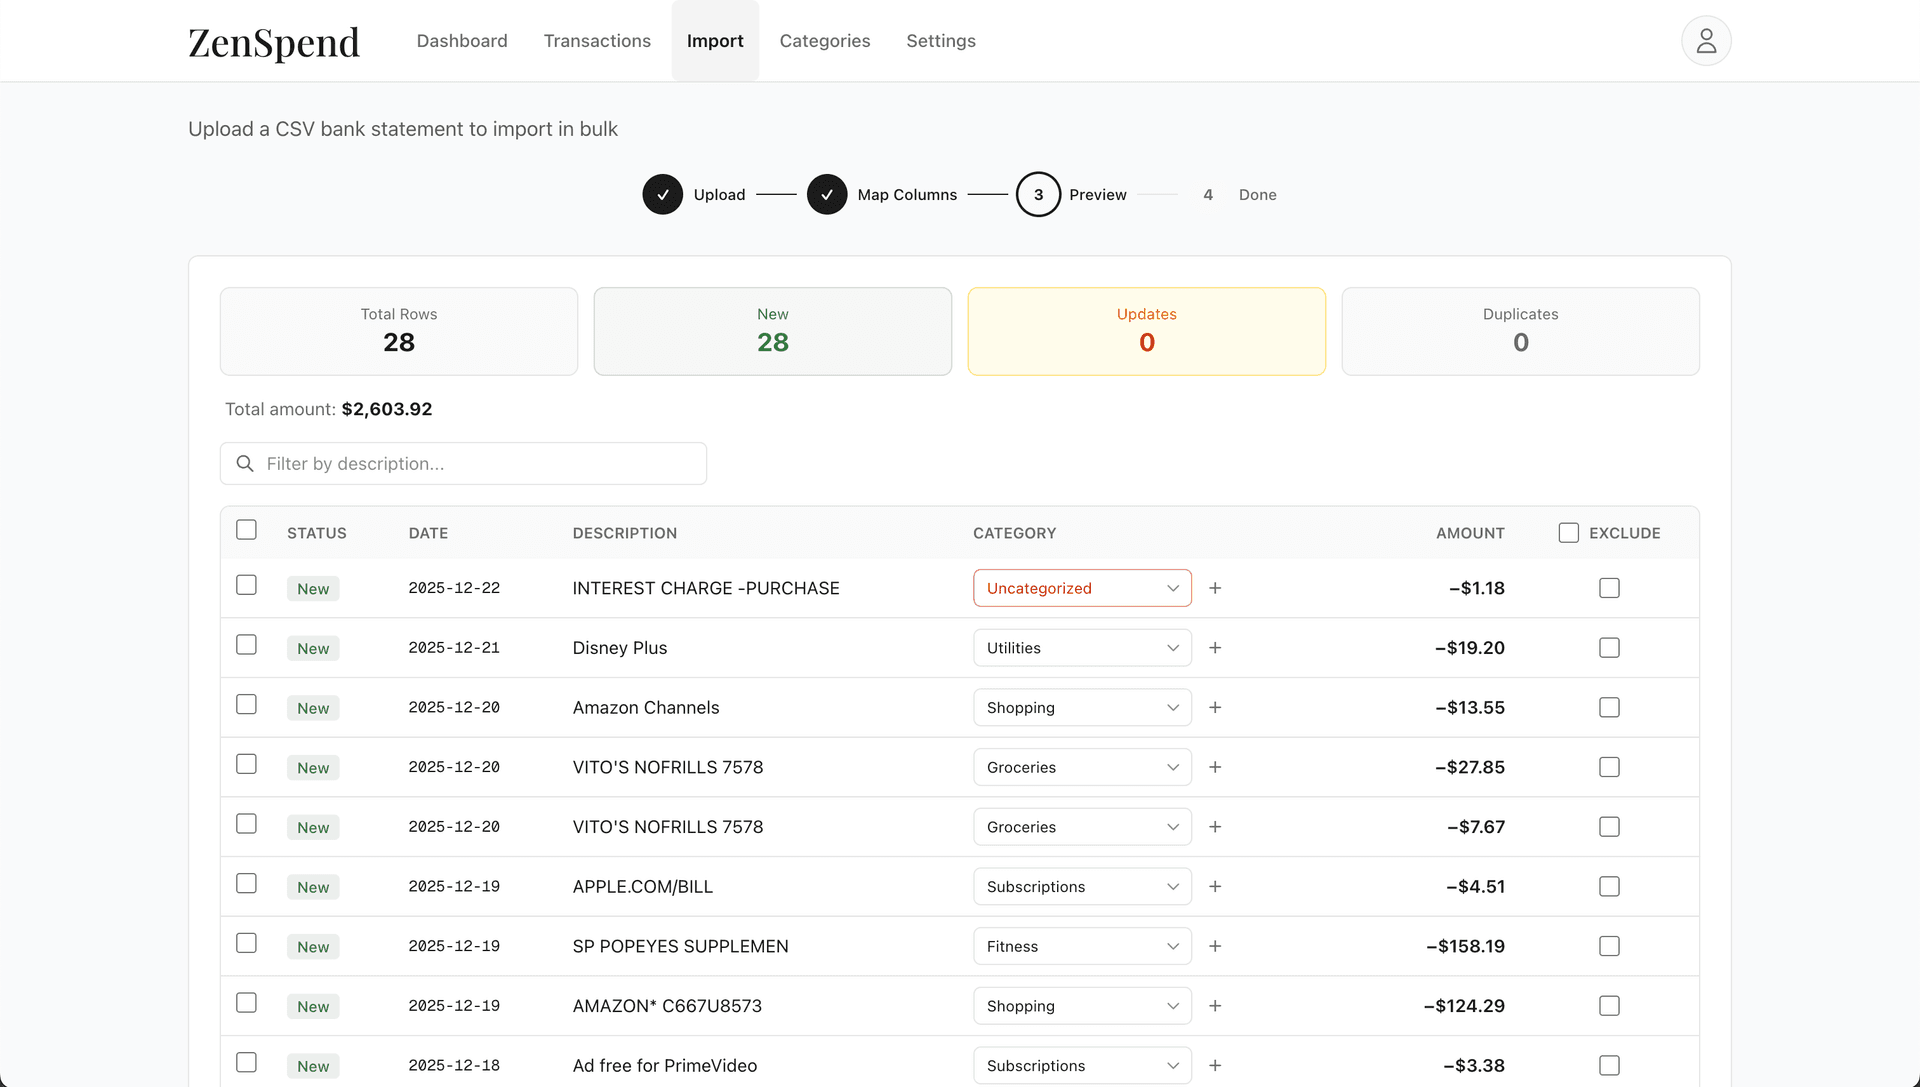
At the top: your import summary
156
Total rows
142
New
8
Updates
6
Duplicates
You'll know exactly what's new, what's already in your account, and what will be updated.
Duplicate detection
Ever accidentally imported the same file twice? We prevent that. Each transaction gets a unique fingerprint based on its date, amount, and description. If we've seen it before, it's marked as a duplicate and excluded automatically.
New: We haven't seen this transaction—it will be imported.
Update: Same transaction, but something changed (like the category)—we'll refresh it.
Duplicate: Exact match—it will be skipped so you don't double-count.
Smart categorization
We try to categorize transactions automatically. First, we check your custom rules (patterns you've created). Then we fall back to built-in keywords—Starbucks goes to Food, Uber to Transportation, Netflix to Utilities, and so on.
If we're not sure, we leave it uncategorized. You can filter to show only uncategorized transactions and handle them in one go.
Full control over every row
For each transaction in the preview, you can:
- Change the category — Pick from the dropdown, or create a new category on the spot.
- Create a rule — See "TRADER JOES #123"? Create a rule so all future Trader Joe's transactions go to Groceries automatically.
- Exclude it — Don't want to import a transaction? Check the exclude box. Credit card payments, transfers between your own accounts, anything you want to skip.
Bulk operations
Got 20 Amazon transactions that should all be "Shopping"? Don't do them one by one.
- 1. Check the boxes next to the transactions you want to change
- 2. A bulk action bar appears at the bottom
- 3. Choose "Set category" or "Exclude" to apply to all selected
We auto-exclude the obvious stuff
Some transactions don't belong in your spending data. We automatically exclude:
- •Credit card payments (they'd double-count your spending)
- •Internal transfers between your accounts
- •Balance transfers and payments to credit cards
You can always un-exclude them if we got it wrong.
Import & see results
When you're happy with everything, hit Import. We process your transactions, apply any category rules, skip duplicates, and update your account.
You'll see a summary of what happened—how many were new, how many updated, how many skipped. From there, you can view your transactions or import another file.
What happens next
Your dashboard updates immediately. Spending breakdowns, habit detection, trend charts—everything reflects your new data. If you imported enough history, you'll start seeing recurring spending habits and opportunity cost projections right away.
Creating category rules
Rules automate categorization for future imports. Instead of manually categorizing "STARBUCKS" every time, create a rule once and forget about it.
Match types
- Contains: Description includes your text anywhere. "AMAZON" matches "AMAZON.COM*123XYZ" and "AMAZON PRIME."
- Starts with: Description begins with your text. Good for banks that put the merchant first.
- Exact: Description matches exactly. Useful for specific recurring charges.
When you create a rule during import, you can also apply it retroactively to existing uncategorized transactions. One click to clean up the past and automate the future.
Common situations
"My bank's CSV looks different every time"
We save your column mapping per account, but we also verify it works with each new file. If columns are different, we clear the mapping and let you re-do it. Takes 30 seconds.
"I have both checking and credit card from the same bank"
Create separate accounts for each. They can have different column mappings, and your spending data stays properly organized. The dashboard can show them combined or separately.
"I imported the wrong file"
Go to the Transactions page and delete what you don't want. You can filter by date range to find the transactions from that import. If you re-import the correct file later, we'll handle duplicates automatically.
"Some transactions are missing after import"
Check if they were marked as duplicates or excluded. In the import results, you'll see exactly what was skipped and why. If they were auto-excluded (like credit card payments), you can re-import with those included.
Ready to import your first statement?
It takes about 2 minutes. Your data stays private and secure.
Get started free